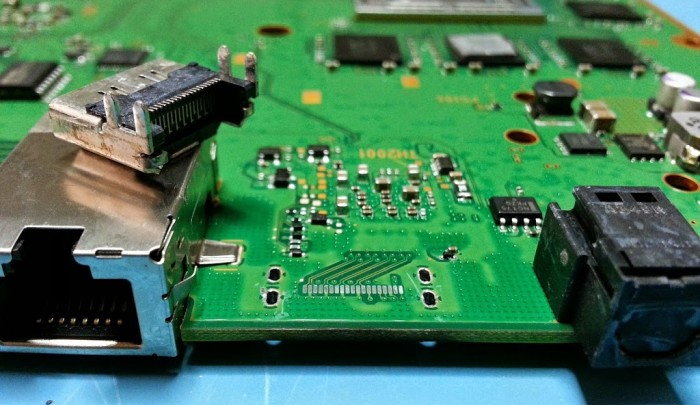
There’s nothing more demoralising than realising there’s something wrong with your PS4’s HDMI port. Until now, your console has been cooperating with your TV without issue, but suddenly, you’re getting an error message. Maybe your connection is dropping in and out, or perhaps you’re seeing “no signal” floating around on your TV, indicating that the cable just isn’t connecting to the PS4. There are two possibilities: either there’s damage to your PS4’s HDMI PCB, or your port itself is faulty.
Let’s get the bad news out of the way first: if you’re looking for a PS4 HDMI PCB fix, you’re not going to find one here, sadly. We would very strongly not recommend trying to fix the PCB yourself, as this is something only experienced engineers should attempt. You could seriously damage or even destroy your PS4, and that’s not something you should risk, no matter how old your console is. There may be no easy PS4 HDMI PCB fix, but if the port is faulty, then there may be something you can do about that.
Diagnose your problem first
The first thing you need to do is make sure your problem is definitely being caused by the HDMI port. You can do this by checking whether the video output on the console is distorted or not. First, power on the console and make sure the HDMI cable is plugged in. If you’re seeing a “no signal” error on your TV, or if the picture somehow doesn’t look right – strange colour balance, for instance, or constantly blinking in and out – then it could definitely be an issue with your HDMI port.
Check it’s not your TV
There’s a chance that the fault could lie with your TV. The best way to find this out is to connect another device to the display using the same HDMI cable. If you find that the problem persists, then it could either be an issue with the cable itself or with the TV. However, if the problem isn’t replicated, then it’s safe to assume that it’s your PS4 that’s the problem. From there, you can do some slightly more complex and in-depth troubleshooting to determine exactly what part of the HDMI setup is at fault, but the chances are that it’s the port itself.
Why is the HDMI port faulty?
Unfortunately, over time, the PS4’s HDMI port can be subjected to serious wear and tear, which means it’ll be damaged. Connecting cables regularly, especially if you do so forcefully, can be a cause of your HDMI port not working, so be careful and delicate when you do connect your cable. In addition, if a sudden movement yanks the cable out of the PS4, that can also damage the HDMI port, so it’s important to make sure that when you do disconnect the cable, you’re doing so slowly. This is in addition to potential wear and tear that simply accrues over time.
Could the HDMI chip be at fault?
If it’s not the HDMI port, then there’s a chance it could be the chip or the PCB that’s causing the issue. Many of the same issues can cause problems with the chip; if you disconnect controllers quickly, you could cause damage to the chip. In addition, disconnecting cables while your PS4 is powered on can cause issues, and if you expose the PS4 to static electricity (for example, by cleaning its internals), then this could also mean damage.
Okay, so how do I fix my HDMI port?
Before we begin, we’d strongly recommend that you send your PS4 to a professional repair shop if the HDMI port is faulty, as fixing it yourself could irreparably damage the console if you don’t do it correctly. Here’s what you’re going to need to fix your HDMI port.
- A soldering iron
- An electronics repair kit
- A desoldering pump
- A replacement PS4 HDMI port
- Solder tin, flux, and wick
- A Torx screwdriver
First, you’ll need to open up your PS4 by unscrewing the plastic screws at the back. You may need to remove stickers in order to do this. Next, unscrew the screws that hold the power supply down; these screws will be towards the exhaust ports at the back of the console. Disconnect the power supply cable (it’s the small one you can see) and lift out the power supply.
After this, unplug the PS4 motherboard cables and unscrew the black screw that you can see near the back of the console. Another screw on the rear of the PS4 will also need to be unscrewed. Remove the small plastic cover on your PS4, and you should see the hard drive tray, which you’ll also need to unscrew. This handy guide has images in case you need them.
The last plastic cover will then need to be removed. Take the screws out and remove the cover. You’ll then see twelve screws dotted around a grey plate. Unscrew all of these, then remove the heatsink clamp (it’s the diamond-shaped object). You should see a small connector, which you should unplug. Remove the metal plate, and then remove the motherboard. From there, you should be able to see the HDMI port, as well as the chip, which could potentially have damage on it.
The next step will involve desoldering, which you can read about here. You will need to desolder the PS4’s HDMI port yourself, and then remove the port using tweezers (if you’re looking to remove the port, of course – if it’s the chip, we’d strongly recommend leaving it alone). Slot in your new HDMI port where the old one was, then re-solder the pins. Again, we would very strongly recommend that you leave this process to a professional, as the risks are too great, but this is the rough process you’ll need to undergo.

